How to sew a corduroy shoulder bag with adjustable strap and welt pockets - Step-by-step tutorial & PDF pattern
- Sonia
- 14 févr.
- 8 min de lecture
In this tutorial, I will show you, step by step, how to sew a large corduroy shoulder bag. This model stands out thanks to its two welt exterior pockets, which give it a neat and polished finish.
You don't need to be a pro to follow this tutorial (or the video version). All the steps are clearly explained. With the accompanying pattern, you can make this bag with intermediate sewing skills.


The bag we are going to make is characterized by:
A main compartment with a zipper closure for secure storage
Two front welt pockets, each closed with a zipper for quick and safe access
An adjustable strap for comfortable shoulder or crossbody wear
A fully lined interior with two pockets
Clean construction with no bias tape required to finish the lining seams
A structured, professional finish
So, are you ready to get started and create your own unique, handmade bag full of charm? Let's go!
Before we begin
The shoulder bag pattern in PDF format
To follow the tutorial, you can purchase the corduroy bag pattern in PDF format from our store. All instructions for printing, cutting, and assembling the pieces are included in the video "How to print and assemble the pattern" and in the PDF pattern.
Materials Needed:
Corduroy fabric for the exterior: 80 cm (31 ½ in) long × 140 to 150 cm (55–59 in) wide.
Lightweight cotton fabric for the lining: 86 cm (34 in) long × 140 to 150 cm (55–59 in) wide.
Lightweight fusible fleece: (approx. 3 mm / ⅛ in thick, such as Vlieseline H630, approx. 86 g/m²): 62 × 60 cm (24 ½ × 23 ¾ in).
Lightweight fusible interfacing: (e.g., Vlieseline H200): 43 × 29 cm (17 × 11 ½ in).
wo zippers: measuring 20 cm (8 in) long.
One zipper: measuring 34 cm (13 ½ in) long (it must measure exactly 34 cm; you can trim it to the correct length).
One slider buckle: 3 cm (1 3/16 in) wide.
One ring: 3 cm (1 3/16 in) wide.
Making the bag
All the steps involved in making the bag are explained in this tutorial (and the PDF accompanying the pattern), and are also available in the following video:
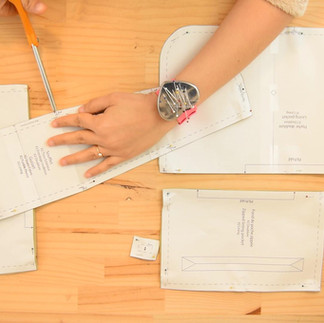
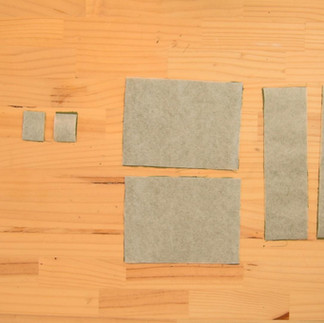
Step 1: Preparation of the Pieces
Take the corduroy fabric.
Place the pattern pieces on the fabric following the cutting layout.
Cut out the pieces.
Transfer all important markings onto the fabric (centers, assembly marks, etc.).
Tip: The pocket welt can be placed vertically or horizontally on the fabric, depending on the desired effect.


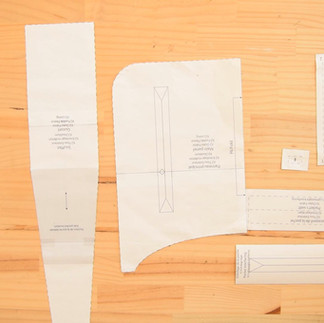
Take the lining fabric.
Place the pattern pieces on the fabric according to the cutting layout.
Cut out the pieces.
Transfer all important markings (fold lines, etc.) directly onto the fabric.


Remove the seam allowances from the panel and gusset pattern pieces.


Place these pieces on the light fusible fleece and cut them out.


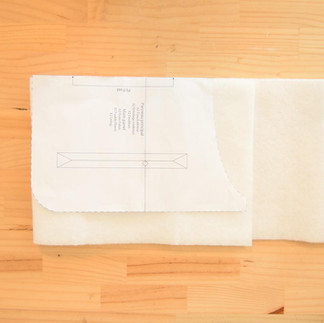
Using the pattern and carbon paper, trace the pocket openings onto a panel fleece piece.
Cut out the openings.


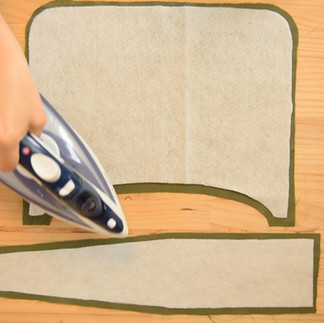
Place each fleece piece on the wrong side of the corresponding outer fabric piece.
Fuse with an iron.


From the light fusible interfacing, cut according to the cutting layout:
the zipped pocket interfacing pieces and their welts
the side pocket pieces
the tabs


Place each interfacing piece on the wrong side of the corresponding fabric, except for the pocket openings.
Fuse with an iron.


Step 2: Preparing the Zipped Pocket Linings
Take the interfacing intended for the zipped pocket openings along with the pattern.
Using the pattern, trace the pocket opening onto the interfacing.


Take the zipped pocket lining pieces and their pattern.
Using the pattern and carbon paper, trace the pocket opening onto the zipped pocket linings.


Place the interfacing pieces on the wrong side of the zipped pocket linings, centered over the traced openings.
Fuse with an iron.


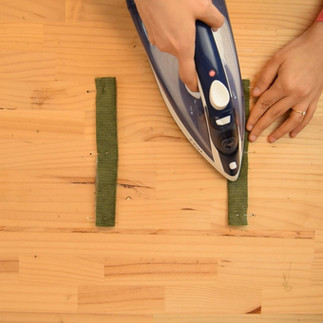
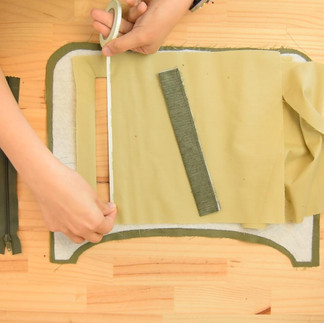
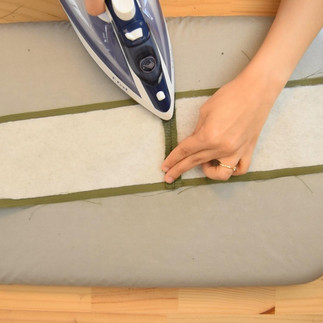
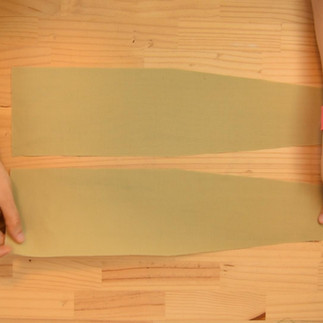
Step 3: Preparing the Welts
Take the two pocket welts.
Fold them in half lengthwise, wrong sides together.
Press to mark the fold.
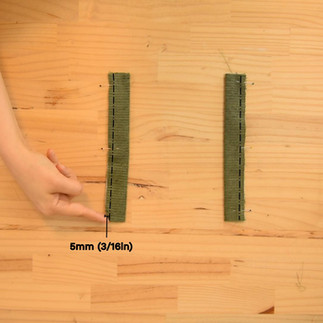
Stitch the open sides at 5 mm (3/16 in) from the edge.


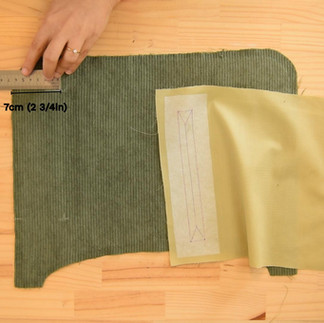
Step 4: Assembling the Zipped Pockets
Take the bag panel in outer fabric with the openings cut in the interfacing.
From the top corner of the panel, mark a point 9.5 cm (3 ¾ in) down.
From this point, mark another point 7 cm (2 ¾ in) toward the inside.
➡️ The resulting point corresponds to the upper corner of the pocket opening.


Draw a horizontal line 4.5 cm (1 ½ in) from the bottom of the panel.
Draw a vertical line 7 cm (2 ¾ in) from the side edge of the panel.
➡️ The intersection point corresponds to the lower corner of the pocket opening.


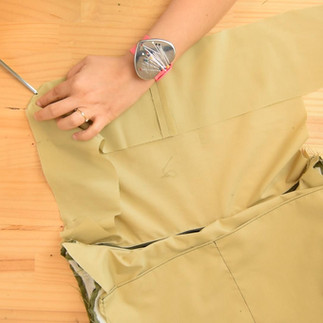
Step 5: Sewing the Pocket Opening
Place the zipped pocket lining on the panel, right sides together, aligning the upper and lower corners of the opening with the marks on the panel.
Stitch all around the rectangle of the opening.
Repeat exactly the same steps for the second pocket.


Cut along the center line of the opening.
Clip the corners diagonally up to the stitching, without cutting through it.
Push the zipped pocket lining through the opening to turn it to the wrong side.
Press carefully to flatten the edges of the opening.


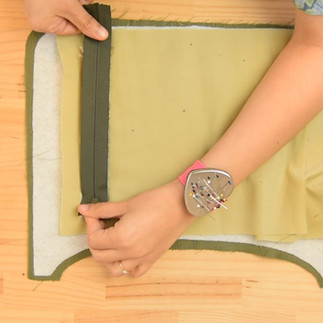
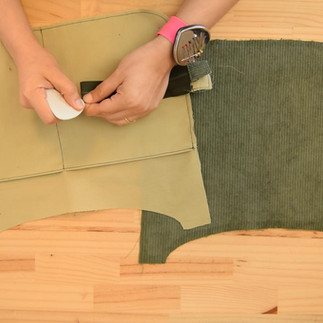
Step 6: Attaching the Welt and Zipper
Take the welts and the two 20 cm (8 in) long zippers.
Apply double-sided fabric tape along the inside edge of the pocket opening, on the lining side.
Position the welt:
raw edge against the tape
folded edge aligned with the opposite edge of the opening
welt centered


Apply a second strip of tape to the other edge of the opening.
Add an extra strip right along the edge of the opening, over the welt.
Position the zipper:
one side against the edge of the opening
the other side against the welt
zipper pull positioned inside the opening (make sure the zipper pull is inside the opening)
If the zippers extend beyond the lining, trim off the excess.


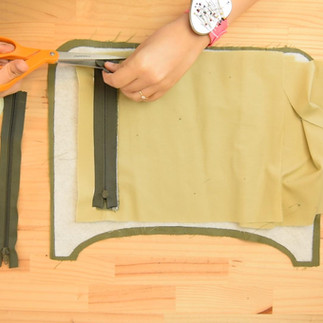
Turn the panel right side up.
Topstitch all around the opening at 3 mm (⅛ in) from the edge.
Repeat for the second pocket.


Step 7: Closing the Zipped Pocket Linings
Fold each zipped pocket lining in half, right sides together, aligning the centers.
Stitch the three sides at 1 cm (⅜ in) from the edge.


Step 8: Side Pockets
Take the outer fabric and lining pieces for the two side pockets.
Place each lining piece on the corresponding outer fabric piece, right sides together.
Stitch the top and bottom edges at 1 cm (⅜ in).


Press.
Turn right side out.
Topstitch the three sides at 5 mm (3/16 in).


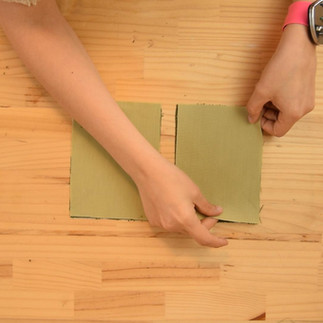
Step 9: The Gusset - Outer Fabric
Take the two gusset pieces in outer fabric.
Place them right sides together, aligning the centers.
Stitch the bottom edge at 1 cm (⅜ in) from the edge.


Press the seam.
Topstitch on both sides of the seam at 5 mm (3/16 in).


Step 10: The Gusset - Lining Fabric
Take the two gusset pieces in lining fabric.
Place them right sides together, aligning the centers.
Stitch the bottom edge at 1 cm (⅜ in) from the edge.
Press the seam.


Step 11: Attaching the Side Pockets to the Gusset
Take the gusset piece in outer fabric and the side pockets.
Place each pocket in its position, wrong side of the pocket against the right side of the gusset, Placing the sides of the pocket against the sides of the gusset.
Stitch the three sides of each pocket at 5 mm (3/16 in) from the edge.


Step 12: Lining Pocket
Fold the lining pocket piece in half, wrong sides together.
Stitch the top edge at 5 mm (3/16 in).


Place the pocket on a lining panel, right sides together, aligning the centers.
Stitch the three sides at 5 mm (3/16 in).
Sew a vertical line down the center to create two compartments.


Step 13: Main Zipper
Take the 34 cm (13 ½ in) zipper and the tabs in outer fabric and lining.
Place one end of the zipper between a tab and its lining, right sides together, centered.
Stitch at 1 cm (⅜ in) from the edge.
Repeat with the other end.


Press the seams.
Turn the tabs right side out.
Topstitch all around at 5 mm (⅛ in).


Step 14: Attaching the Panels to the Zipper
Mark the centers of the zipper.
Place the zipper along the top of the outer panel, right sides together.
Clip the zipper at the curves so it follows to the shape of the panel.
Place the lining panel on top, right sides together, aligning the centers.
Stitch at 1 cm (⅜ in) from the edge.


Repeat exactly the same steps for the second side of the zipper and the second panel.


Clip the curved seam allowances.
Turn the panels right side out and topstitch at 5 mm (3/16 in) from each seam.


Step 15: Attaching the Gusset to the Bag Panels
Take the bag body (panels attached to the zipper).
Fold the outer fabric panels together and the lining panels together.
Leave the zipper open.
Place one side of the outer gusset around the perimeter of one outer panel, right sides together, aligning the centers.
Clip the gusset along the curves to follow the shape.
Stitch at 1 cm (⅜ in) from the edge.


Repeat for the second side of the gusset and the second outer panel.


Place one side of the lining gusset around the perimeter of one lining panel, right sides together, aligning the centers.
Clip along the curves and stitch at 1 cm (⅜ in) from the edge, leaving a 15 cm (6 in) opening for turning the bag.


Repeat for the second side of the gusset and the second lining panel, without leaving an opening.


Press the seam allowances of the opening.
Turn the bag right side out through the lining opening.


Step 16: Making the Straps
Take the strap piece.
Fold it in half lengthwise, wrong sides together, and press to mark the fold.
Unfold, then fold each long edge toward the center line, wrong sides together, and press.


Fold the strap in half lengthwise again and press one last time.
Topstitch both long edges at 5 mm (3/16 in).


Repeat exactly the same steps to make the strap tab.


Step 17: Attaching the Straps to the Bag
Take the bag, the strap, the strap tab, and the buckles.
Insert one end of the strap into one end of the bag, right sides together, aligning raw edges and centers.
Pin the lining, outer fabric, and strap together.
Stitch the layers at 1 cm (⅜ in) from the edge.


Thread the strap tab through the ring, then fold it in half.
Insert this folded tab into the second end of the bag, right sides together, centered, and stitch at 1 cm (⅜ in) from the edge.


Turn the bag right side out.
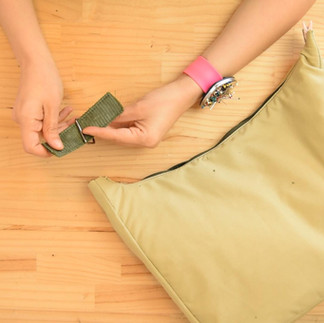
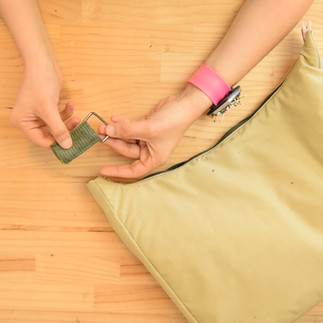
Thread the free end of the strap through the sliding buckle.
Trim the end of the strap with pinking shears.


Thread the strap through the ring of the strap tab, then back through the sliding buckle from the bottom.
Fold the strap back on itself by about 2 cm (¾ in) and stitch to secure.


Step 18: Sewing the Lining Opening Closed
Fold the edges of the lining opening inward by 1 cm (⅜ in).
Pin to hold in place.
Stitch at 2 mm (1/16 in) from the edge to close the opening, or sew a slip stitch by hand for a more discreet finish.


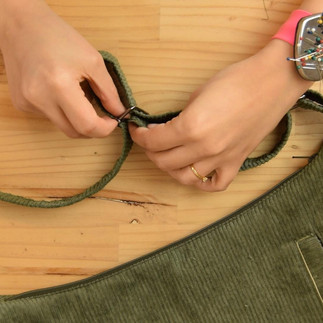
Step 19: Zipper Decoration
Take a 60 cm (24 in) length of cord. Thread it through the zipper pull and tie a knot.
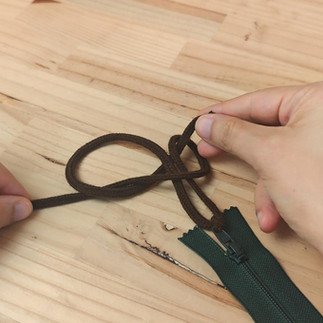
Place the zipper pull at the bottom, then lay the two cord ends above it on your work surface. Measure about 5 cm (2 in) from the zipper pull.


Take the right cord and pass it over both strands (which we will call the body of the keychain).
Then take the left cord and pass it under the body of the keychain, making sure to leave the right cord inside the loop that forms.
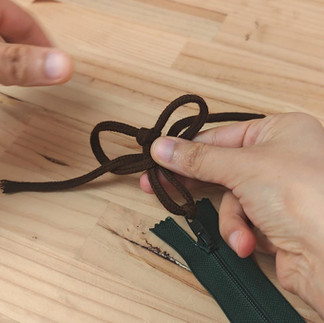
Pass the left cord through the loop newly formed by the right cord, then tighten.


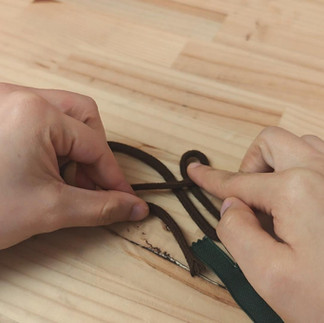


Now repeat the exact same steps, but this time starting with the left cord.
Pass it over the body of the keychain.
Then take the right cord and pass it under the body of the keychain, leaving the left cord inside the loop.
Pass the right cord through the loop newly formed on the left side of the keychain, then tighten.


Continue in the same way, alternating sides each time.
Cut the cord ends.


Your bag is ready!

