How to sew a crossbody bag with inner and outer pockets – tutorial and PDF pattern
- Sonia
- 15 avr. 2025
- 5 min de lecture
Dernière mise à jour : 30 avr. 2025
Looking for a bag that’s both practical and stylish? This crossbody bag has you covered! It’s fully lined and features both inner and outer pockets, plus a secure zipper closure—perfect for everyday use.
In this tutorial, I’ll take you through the entire sewing process step by step, from cutting the pieces (using the crossbody bag sewing pattern) to the final assembly. By the end, you’ll have a beautifully finished bag you’ll be proud to wear or gift!

Before starting
The crossbody bag sewing pattern
To follow the tutorial, you can download the shoulder bag sewing pattern in PDF from our store. All instructions for printing, cutting and assembling the pieces are included in the pattern PDF.
Supplies to make the bag
To make this project, you'll need
exterior fabric: a quilted fabric or a cotton canvas (if using canvas, apply interfacing for added structure), 80cm x 62cm (31 1/2in x 24 1/2in).
lining fabric: lightweight cotton or nylon, 80cm x 106cm (31 1/2in x 42in).
zippers: two zippers, each precisely 27 cm (10 5/8 in) length (trim if necessary).
strap: a 25mm (1in) wide strap, measuring 1.2m (47 1/4in) in length.
hardware:
one 25mm (1in) wide sliding buckle,
two 25mm (1in) wide swivel snap hooks,
two 25mm (1in) wide D-rings.
Making the shoulder bag
All the steps to make the bag are explained in this tutorial (and the PDF accompanying the pattern), and are also available in the following video:
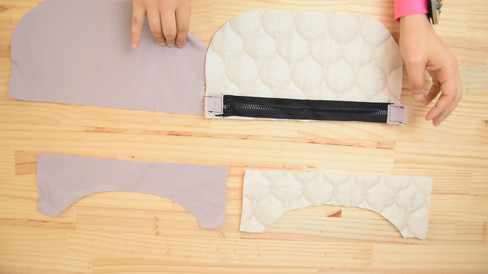
Step 1: cutting and preparing parts
Fold the outer fabric and cut the pattern pieces according to the cutting layout.


Repeat the process for the lining fabric, cutting the corresponding pieces.


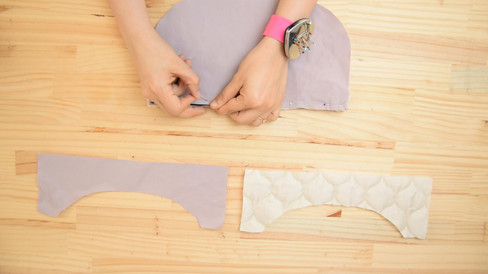
Before removing the patterns, transfer the important markings to the fabrics.


Step 2: making the front panel
Position one end of the zipper between a tab and its lining, right sides together at the center.
Stitch 1 cm (3/8 in) from the edge. Repeat for the other end.


Turn the tabs right side out and topstitch all around 5 mm (3/16 in) from the edge.


Mark the center of the zipper.
Take the lower part of the front piece along with its lining and the zipper.


Place the zipper between the outer fabric and the lining, right sides together, ensuring the center markings align.
Stitch 1 cm (3/8 in) from the edge.


Take the upper part of the front piece and its lining.
Position the second side of the zipper between the outer fabric and the lining, right sides together, aligning the center markings.
Stitch 1 cm (3/8 in) from the edge.


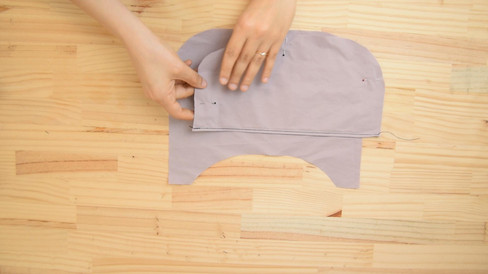
Turn the fabric right side out and topstitch 5 mm (3/16 in) from the edge.


Place the bag exterior on top of the lining, with the wrong side against the right side.
Stitch all around 5 mm (3/16 in) from the edge.


Step 3: making the back panel
Place the back pocket lining on the back pocket outer fabric, right sides together.
Stitch along the top edge 1 cm (3/8 in) from the edge.


Turn the pocket right side out and topstitch 5 mm (3/16 in) from the edge.


Position the pocket on the back bag face piece outer fabric, with the wrong side of the pocket against the right side of the bag face.
Stitch along the three sides 5 mm (3/16 in) from the edge.
Sew a vertical line down the middle to divide the pocket into two sections.


Step 4: making the lining pocket
Fold the lining pocket in half, with wrong sides together.
Topstitch along the top edge 5 mm (3/16 in) from the edge.


Position the pocket on the bag faces lining piece, right sides together.
Stitch along the three sides 5 mm (3/16 in) from the edge.
Then, sew a vertical line down the middle to divide the pocket into two sections.


Step 5: sewing the zipper
Place one end of the zipper between a tab and its lining, right sides together, aligning it in the center.
Stitch 1 cm (3/8 in) from the edge.
Repeat this for the other end.
Turn the tabs right side out and topstitch around all edges 5 mm (3/16 in) from the edge.
Mark the center of both the bag faces and the zipper.
Position the zipper on the top of the exterior of the bag face, right sides together, ensuring it is centered.
Then, place the lining of the face on top, right sides together.
Stitch 1 cm (3/8 in) from the edge.


Repeat the same steps for the second side of the zipper and the second bag face.


Clip the rounded edges at the top of the bag.


Flip the pieces right side out and topstitch along both sides of the zipper, 5 mm (3/16 in) from the edge.


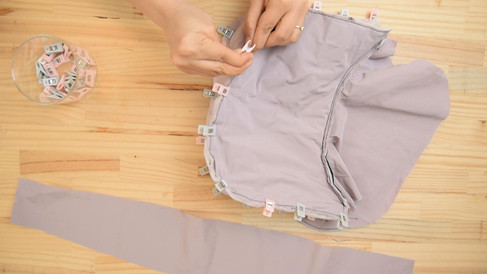
Step 6: bag assembly
Fold the bag, exterior to exterior and lining to lining.
Open the zipper.
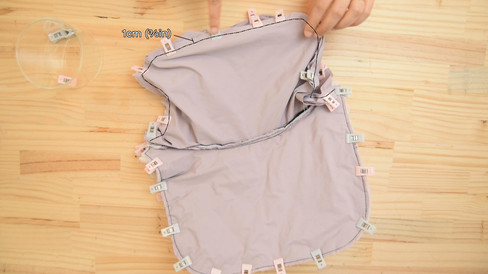
Place one edge of the perimeter, outer fabric on the edge of the face of the bag outer fabric, right sides together, aligning the markings.
Pin the second edge of the perimeter to the second face of the bag, right sides together, ensuring the markings match.
Stitch each side 1 cm (3/8 in) from the edge.


Position one edge of the perimeter lining on the edge of the face lining, right sides together, aligning the markings.
Pin the second edge of the perimeter to the second face of the bag, right sides together, matching the markings.
Stitch each side 1 cm (3/8 in) from the edge, leaving a 12 cm (5 in) opening on one side for flipping the bag.


Cut two 10 cm-long pieces of strap.
Pass each piece through a ring, then fold the strap in half.
Stitch 1 cm (3/8 in) from the ring.


Slide one of the straps into an opening at one end of the bag (outer fabric, right sides together),
then slide the second strap into the opening at the other end of the bag (outer fabric).
Pin the end of the bag, the lining to the outer fabric and the strap,
then stitch everything at 1 cm (3/8 in) from the edge.


Clip the corners of the bag ends and notch the rounded curves.

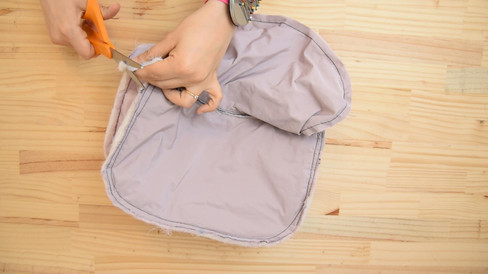


Flip the bag right side out through the opening in the lining.
Pin and stitch the lining opening closed 2 mm (1/16 in) from the edge.


Step 7: Making the strap
Take a 1-meter strap, pass one end through a sliding buckle, then through a hook,
and then back through the sliding buckle from the back side.
Fold the strap over about 2 cm (3/4 in) and stitch it in place.


pass the other end through a hook, fold it over about 2 cm (3/4 in), and stitch it in place.


Attach the strap to the bag.


Your bag is now complete and ready to use!


