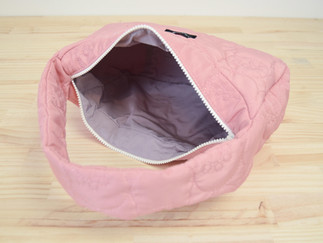
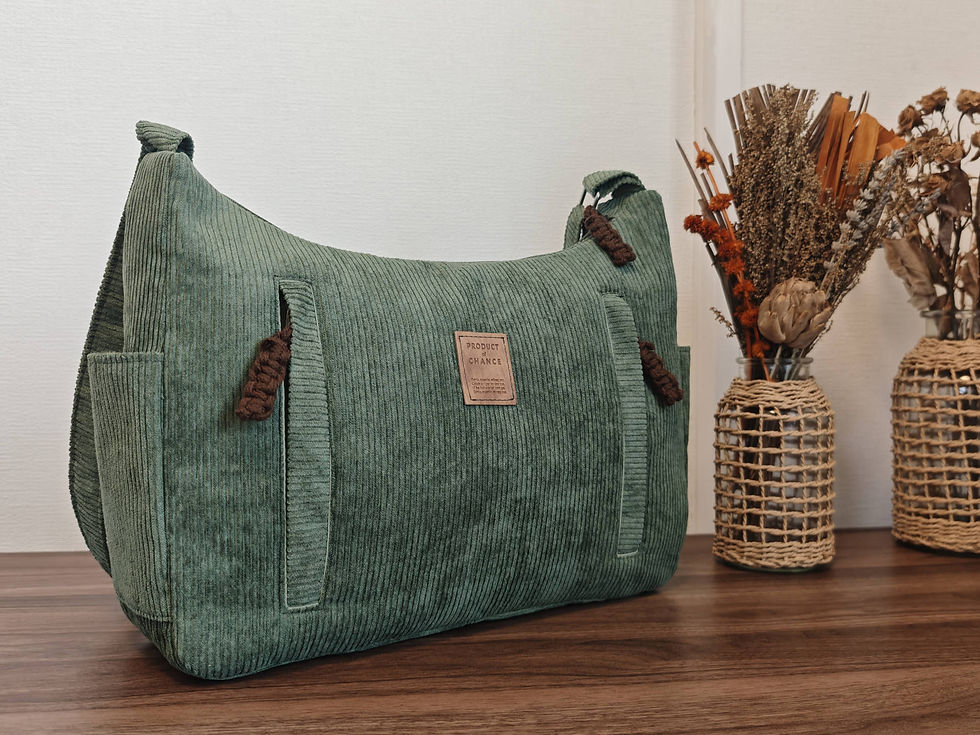
How to sew a korean style quilted shoulder bag - tutorial and PDF pattern
- Sonia
- Mar 7, 2025
- 3 min read
Updated: Apr 14, 2025
In this tutorial, I'll show you how to make a quilted shoulder bag inspired by Korean style.
I'll guide you through the sewing process, step by step, to help you create your very own bag.
Before starting
To follow the tutorial, you can download the quilted shoulder bag pattern in PDF from our store. All instructions for printing, cutting and assembling the pieces are included in the pattern PDF.
Supplies to make the bag
To make this project, you'll need
a 50 cm x 51 cm (19 ¾ in x 20 in) quilted fabric for the outside;
a 40 cm x 40 cm (15 ¾ in x 15 ¾ in) light nylon fabric for the lining;
a 30 cm (12 in) zipper.
Making the bag
All the steps to make the bag are explained in this tutorial (and the PDF accompanying the pattern), and are also available in the following video:
Step 1: cutting and preparing parts
Pin the pattern pieces on the wrong side of the fabric and the lining as shown in the cutting layout.
Cut out the fabric pieces.


Before removing the paper pattern pieces from the fabric, transfer the pattern important markings to the fabric pieces.


Step 2: Making the perimeter
Grab the outer perimeter piece and the inner perimeter piece,
Place the inner one over the outer one right sides together, matching the markings.
Stitch the sides 1cm (⅜ in) from the edge, leaving 1cm (⅜ in) free on each end.


Clip the free ends of the inner perimeter to 1 cm (⅜ in).
Clip the curve of the perimeter.
Flip the perimeter right side out.


Step 3: Sewing the zipper
Take a top piece with its lining and the zipper.
Place the zipper between the outer fabric and the lining right sides together, matching the middles.
Stitch 1 cm (⅜ in) from the edge.


Fold the fabric right side out and topstitch 3 mm (⅛ in) from the edge.
Topstitch over the lining to make it easier.


Take the second top piece of the bag and its lining and place the second side of the zipper between them, matching the middles.
Stitch 1 cm (⅜ in) from the edge.


Fold the fabric right side out and topstitch 3 mm (⅛ in) from the edge.


Step 4: the bag faces
Place one side of the top piece on the top side of one bag face.
Pin the top piece outer fabric with the bag face (outer fabric only) right sides together.
Stitch 1 cm (⅜ in) from the edge.


Clip the top of the bag.


Do the same with the second side of the outer fabric of the top of the bag, as well as the second face of the bag.


Trim the excess zipper.


Step 5: Assembling perimeter and faces
Place one side of the inner perimeter over one end of the top of the bag, right sides together.
Pin and stitch on both sides 1 cm (⅜ in) from the edge, leaving the zipper as well as the lining free.
Do the same with the second side.


Place the bag base over the ends of the bag's outer perimeter, right sides together.
Stitch them 1cm (⅜ in) from the edge.


Flip the base right side out and topstitch the seams 3 mm (⅛ in) from the edge.


Pin the face of the bag to one side of the outer perimeter right sides together, matching the markings.
Stitch 1cm (⅜ in) from the edge.
Open the zipper and place the second face on the second end of the bag's outer perimeter.
Stitch 1cm (⅜ in) from the edge.


Clip the bag's curves and corners.


Step 6: Making the lining
Place one side of the lining of the top piece over the top side of the lining of one face of the bag right sides together.
Stitch 1 cm (⅜ in) from the edge.


Clip the rounded part of the top of the lining.
Do the same with the second side of the lining.


Place the lining base on the bottom ends of the lining sides right sides together.
Stitch 1 cm (⅜ in) from the edge.


Take the perimeter of the lining, place each of its ends on the sides of the top of the bag lining side, right sides together.
Stitch 1 cm (⅜ in) from the edge. This time stitch the outer fabric with the lining as well as the zipper.


Pin the lining face of the bag to one side of the lining perimeter right sides together, matching the markings.
Stitch 1 cm (⅜ in) from the edge.


Do the same with the second face, but leave a 15 cm (6 in) opening to flip the bag over.


Clip the rounded edges of the lining.


Flip the bag right side out.
Pin and stitch the lining opening by machine or using a slip stitch.


Your bag is ready.


Comments