How to sew a heart shaped vanity bag - tutorial and PDF pattern
- Sonia
- Mar 5, 2025
- 4 min read
Updated: Mar 11, 2025
In this tutorial, I will show you how to make a quilted gingham heart shaped vanity bag (train case or makeup bag) with a handle and a zipped inner pocket.
I will guide you through the entire sewing process, step-by-step, to help you create your own quilted toiletery bag.
Before starting
To follow this tutorial, you can download the quilted vanity bag pattern in PDF from our store. All the instructions for printing, cutting and assembling the parts of the pattern are included in the PDF.
Supplies to make the makeup bag
To make this project, you'll need
a 30 cm x 70 cm (0.33 yards x 0.77 yards) quilted fabric for the outside of the vanity bag;
a 30 cm x 60 cm (0.33 yards x 0.66 yards) lightweight cotton fabric for the lining;
a 23 cm x 21 cm (9 in x 8 ¼ in) mesh fabric;
a 55 cm (21 ⅝ in) long zipper;
a 20 cm (7 ⅞ in) long zipper;
bias tape 2 cm (¾ in) wide and 1.7 m (1.86 yards) long.
Making the vanity
All the steps involved in making the makeup bag are explained in this tutorial (and the PDF accompanying the pattern), and are also available in the following video:
Step 1: cutting and preparing parts
Fold the outer fabric and cut the pattern pieces as shown on the cutting layout.


Cut the lining pieces in the same way as for the outer fabric.


Cut the pocket from the mesh fabric.


Before removing the paper pattern pieces from the fabric, transfer the pattern important markings to the fabric pieces.


Step 2: Making the perimeter
Grab the two pieces of the bag's perimeter and their lining.
Grab the long zipper.
Mark the middle of the perimeter pieces and the zipper.
Open the zipper.
Place one side of the zipper between the outer fabric and the lining of one side of the perimeter, right sides together, respecting the middle.
Place the second side of the zipper between the outer fabric and the lining of the second perimeter, right sides together, respecting the middle.
Stitch each side 1 cm (⅜ in) from the edge.


I've removed the zipper slider to make this easier. This step is optional.
Since I've removed the slider, I'll trim the excess zipper and put it back in place.


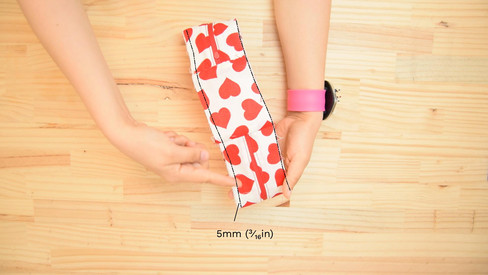
Fold the fabric right sides together and topstitch 5 mm (⅛ in) from the edge on either side of the zipper.


Fold the bag handle right sides together and stitch the long side 1 cm (⅜ in) from the edge.


Press the seam,
Flip the piece right side out and iron a second time.


Take the perimeter, the back piece and its lining, and the handle.
Place one end of the handle over one end of the zipper, right sides together.
Then place one end of the perimeter between the back piece and its lining, right sides together.


Place the second end of the handle over the second end of the zipper, right sides together.
Place only the outer fabric of the back piece over the second perimeter end, right sides together.
Stitch both ends of the perimeter 1 cm (⅜ in) from the edge.


Fold the free end of the back piece lining over 1 cm (3/8in) and press.


Fold the lining over to cover the seam and pin in place.
Use an invisible stitch to sew the lining.


Stitch the lining with the outer fabric all around the perimeter, 5 mm (⅛ in) from the edge.


Step 3: Making the faces
Place the linings on the outer fabrics of the faces wrong sides on wrong sides and stitch all around 5 mm (⅛ in) from the edge.


Cut two pieces of bias to the length of the mesh pocket.
Fold the bias in half,and place it on the straight edge of each of the pocket pieces.


Take the small zipper and both sides of the mesh pocket.
Mark the centers of the zipper and both sides of the pocket.
Place the two sides of the pocket on either side of the zipper, wrong sides on right sides, and stitch two parallel seams 2 mm (¹⁄₁₆ in) from the bias edges.

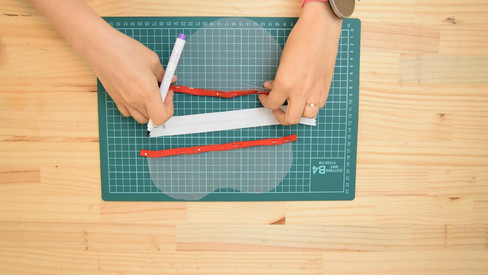


I opted to use a red zipper instead of the white one because I find the color stands out better with the lining.
I put the zipper slider back on. This step is optional - you don't need to remove the slider to sew.


Place the pocket on one face of the bag, wrong side on right side, and stitch all around 5 mm (⅛ in) from the edge.


Trim off any excess zipper.


Step 4: Bag assembly
Mark the middle of the bag perimeter.
Place the top edge of the perimeter on the top face of the bag, right sides together, matching the markings.
Open the zipper.
Place the bottom edge of the perimeter on the bottom face of the bag, right sides together, matching the markings.
Stitch both sides, 1 cm (⅜ in) from the edge.


Fold one end of the bias binding inward 1 cm (⅜ in) and place all around the bag’s face.
Cut the bias to length of the perimeter + 1cm (⅜ in).
Stitch 5 mm (⅛ in) from the edge.
Do the same with the second face.


Clip around the rounded edges of the bag.
Fold the bias towards the inside of the bag and stitch by machine or using an invisible stitch.


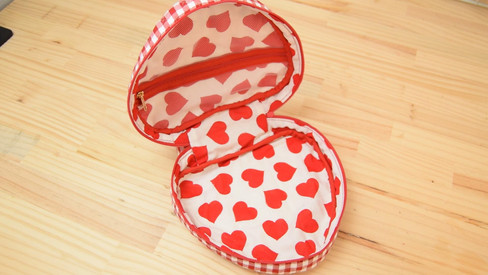
Your bag is ready!


Comments